二段階認証設定
~Two-step authentication setting~
ログイン後、最初に二段階認証の設定を行います。
After logging in, first make "two step authentication" setting.
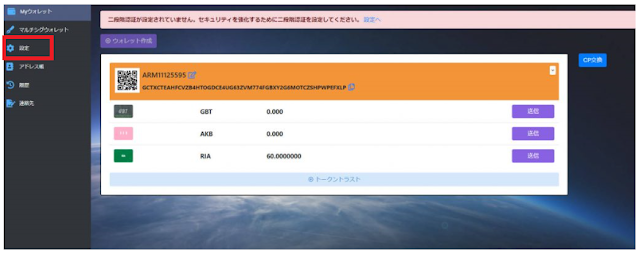
①画面左、赤枠の「設定」⇒「セキュリティ」へ進みます。
Press 'Settings' enclosed in red on the left of the screen ⇒ Next go to 'Security'.
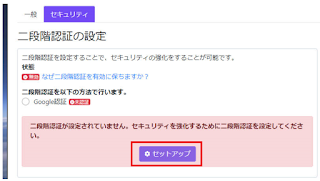
②「セットアップ」をクリックします。
Click "Setup".
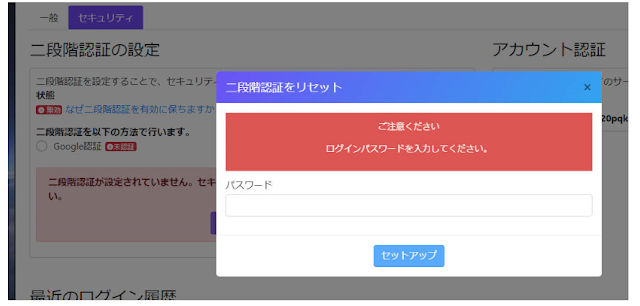
③GREENBOX Wallet ログイン時のパスワードを入力、次に進みます。
GREENBOX Wallet Enter the login password, then proceed.
下記画面に変わります。
It changes to the screen below.
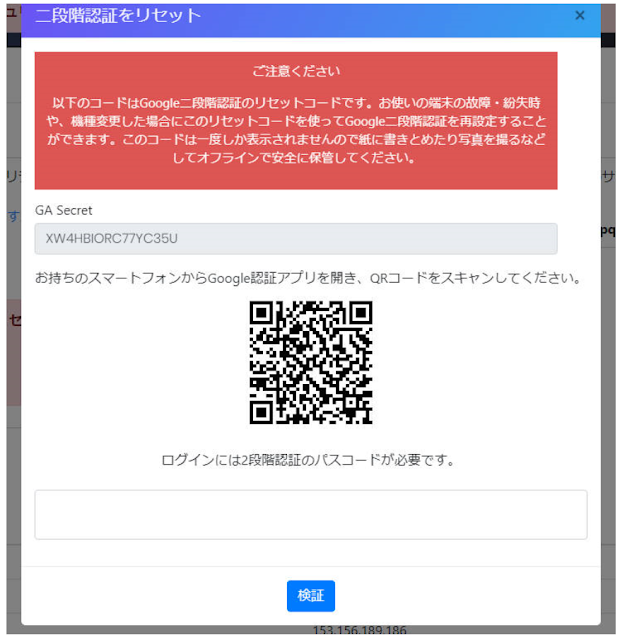
これは、Google二段階認証のリセットコードです。
お使いの端末の故障・紛失時や、機種変更した場合にこのリセットコードを使ってGoogle二段階認証を再設定することができます。このコードは一度しか表示されませんので紙に書きとめたり写真を撮るなどしてオフラインで安全に保管してください。
This is the reset code for Google Two Step authentication.
You can reconfigure Google Two-step authentication with this reset code when your device is broken or lost, or when you change the model. Since this code is displayed only once, please save it offline safely by writing down on paper or taking a picture.
*GA Secretについてはこちら
※Click here for GA Secret
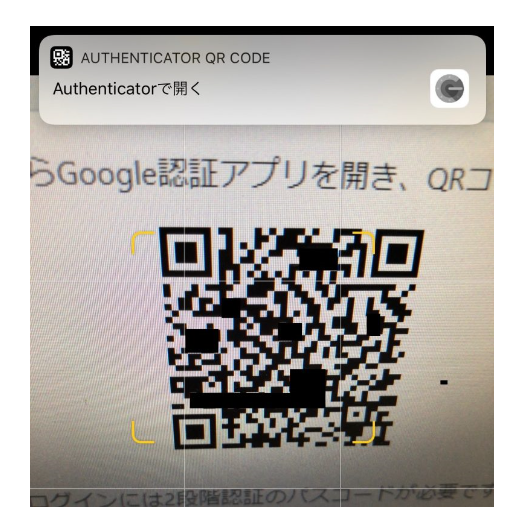
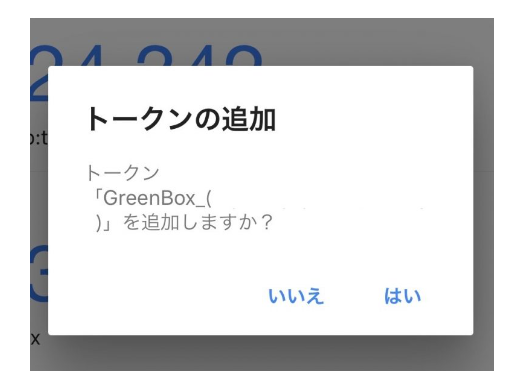
④QRコードをスマートフォンでスキャンすれば、「AUTHENTICATOR QR CODEで開く」の表示がでるので、あとは流れ通りに進めれば、登録されます。
If you scan the QR code with your smartphone, you will see "Open with AUTHENTICATOR QR CODE", so if you proceed as you go, it will be registered.
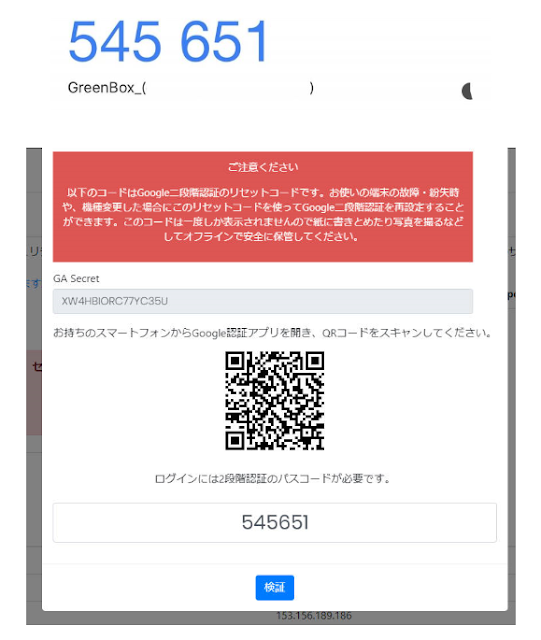
⑤表示されている数字を入力して、検証をクリックします。
二段階認証の設定は完了です。
Enter the number displayed and click Validate.
"Two-step authentication" setting is completed.
GA Secret
二段階認証の設定で、バーコードが読み込めない等の場合、GA Secretキーを手動で入力して、設定を行う事も可能です。
If you can not read the barcode in "Two-step authentication" setting, you can manually enter the GA Secret key and make the setting.
1.二段階認証アプリの画面上部赤枠の「+」をクリックします。
Click the "+" in the red frame at the top of the "Two-step authentication" application screen.
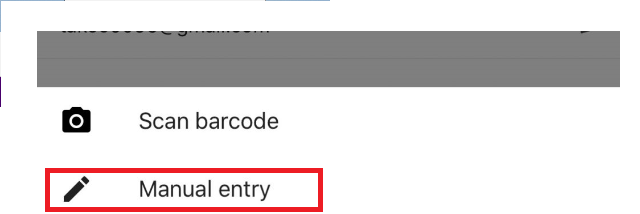
2.同じ画面下に上図が表示されますので、「Manual entry」をクリックします。
The above figure is displayed under the same screen, so click "Manual entry".
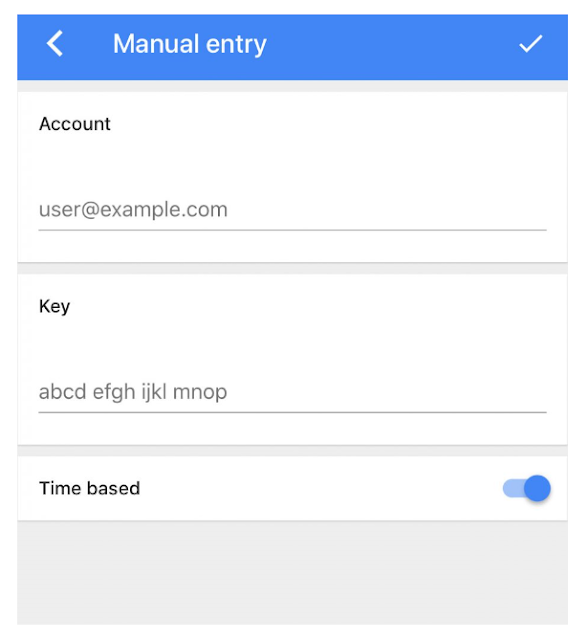
3. Account:GEENBOX Walletログイン時のメールアドレスを入力
key :GA Secretキーを入力
Account: GEENBOX Wallet Enter your login email address
Key: Enter GA Secret key
あとは、通常の流れと同様に進めて設定完了です。
After that, the setting is complete as well as the normal flow.
