e-Z-pay申込方法
~How to apply e-Z-pay~
~はじめに~
申込サイトへ移動します。
First of all, I will move to the application site.
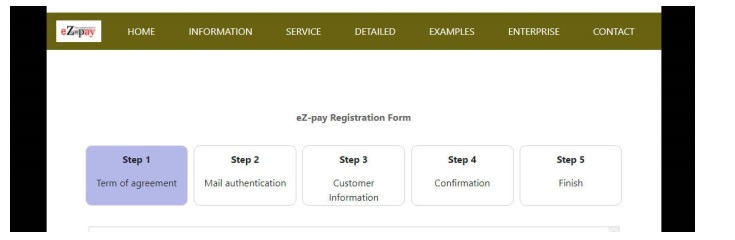
STEP1
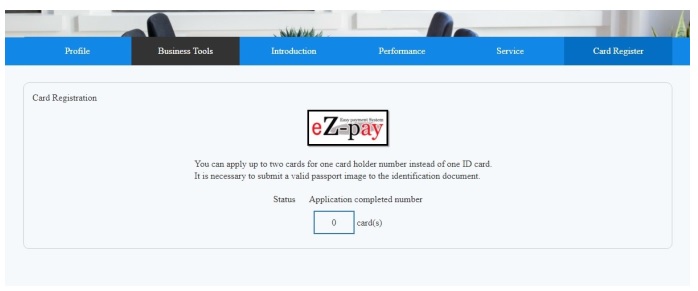
ROBINメンバーページ内の「メニュー」「カード申込」から『e-Z-pay』のリンクをクリックしてはじめます。
Start by clicking the "e - Z - pay" link from "Menu" "Card Application" in the ROBIN Member Page.
規約を確認してページの下までスクロール。
Scroll to the bottom of the page after reviewing the terms.
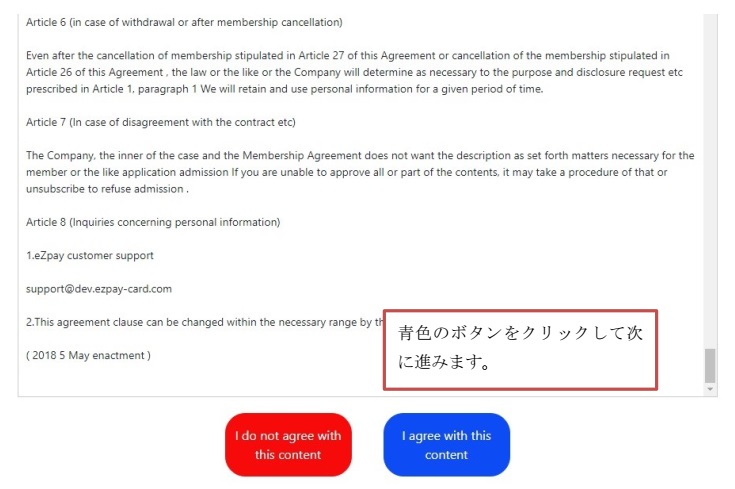
最後までスクロールすると、上図画面が出るので同意の「青色」をクリック。
When scrolling to the end, the above figure screen appears, so click on "consent" "blue".
STEP2
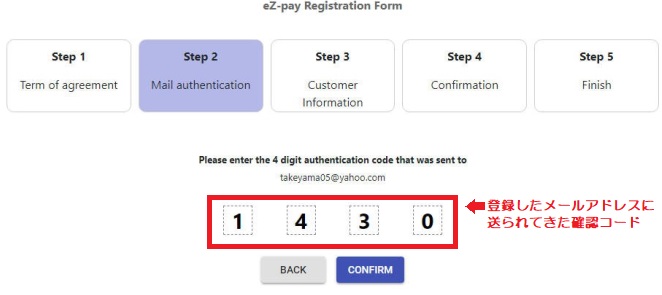
メールアドレスを入力する画面に切替ったら、入力し登録。
しばらくすると、登録したメールアドレスに確認コードが記載されたメールが届きます。
「確認コード」を確認したら、画面に戻り上図のとおりコードを入力。
「CONFIRM」をクリックします。
※1 確認コード有効時間は15分
※2 登録するメールアドレスはROBINで使用していなくてもOK
After switching to the screen to enter the e-mail address, enter and register.
After a while, an e-mail with a confirmation code will be sent to the registered e-mail address.
After checking "Confirmation code", return to the screen and enter the code as shown above.
Click "CONFIRM".
※ 1 validation code valid time is 15 minutes
※ 2 Even if you do not use e-mail address to be registered with ROBIN OK
STEP3

カスタマーインフォメーションを入力、各項目の説明は以下のとおりです。
※全てローマ字、半角英数字でご入力ください
Enter customer information, the explanation of each item is as follows.
※Enter letters and numbers with half-width characters
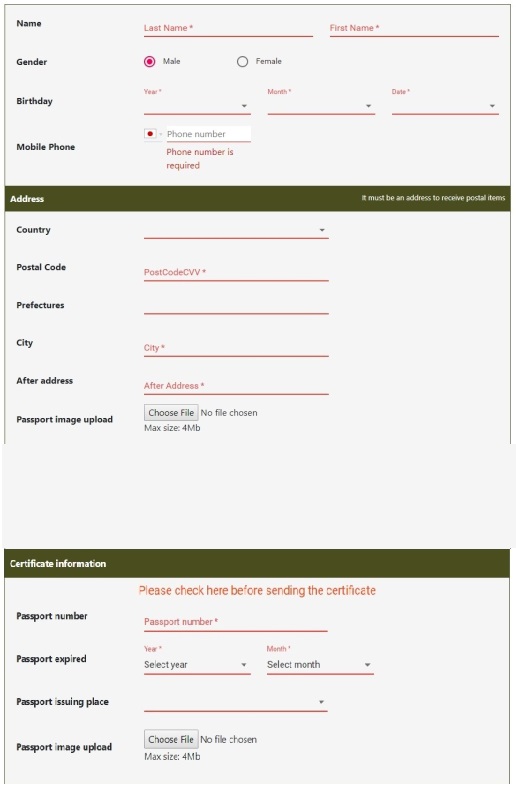
・Name:Last Name 姓/First Name 名
※こちらに入力した文字がそのままカードに印字されます
・Gender:Male 男性/Female 女性
・Birthday:Year 年/Month 月/Date 日
・Mobile Phone:携帯電話番号(ハイフン無し、最初の0を除いた10桁)
・Country:居住国
・Postal Code:郵便番号(ハイフン無し)
・Prefectures:都道府県
・City:市区
・After address:番地、町名
・Building name/room number:マンション名/部屋番号
※住所入力は全てローマ字、半角英数字でご入力下さい
・Passport number:パスポート番号(例 TR123456789)
・Passport expired:パスポートの有効期限
・Passport issuing place:パスポートの発行地
・Passport image upload:パスポート画像のアップロード
・Number Of Card:カード発行枚数を選択最大2枚まで申込可
・Card base:通貨はUSDのみ
・Name: Last Name / First Name
※ The characters entered here will be printed on the card as is
・Gender: Male / Female
・Birthday: Year / Month / Date
・Mobile Phone: Mobile phone number (no hyphen, 10 digits except the first 0)
・Country: Country of residence
・Postal Code: Zip code (no hyphen)
・Prefectures: prefectures
・City: city
・After address: Street address
・Building name / room number: apartment name / room number
※ Enter letters and numbers with half-width characters
・Passport number: Passport number (eg TR 123456789)
・Passport expired: Passport expiration date
・Passport issuing place: Issue place of passport
・Passport image upload: Upload passport image
・Number Of Card: Select the number of cards issued (maximum of 2 cards possible)
・Card base: Currency is USD only
【パスポート画像アップロードについて】
~About uploading passport image~

パスポート画像は、鮮明で顔写真が写っているページのみをアップロードして下さい。
アップロードサイズは400KB以上4MB未満です。
Please upload only the passport image, which is clear and has a photo of your face.Upload size is 400 KB or more and less than 4 MB.
各項目を入力後、同意書の各項目に☑を入れる。
After entering each item, put ☑ in each item of the consent form.

全てに☑が入れば、赤枠「REGISER」をクリック。
If ☑ enter everything, click the red frame "REGISER".
入力内容確認画面で内容を確認し、問題がなければ「COMFARM」」をクリック。
Check the contents on the input content confirmation screen and click "COMFARM" if there is no problem.

※以下の場合は次に進むことができませんので、画像の変更をしてください
・申請内容(パスポート情報)と画像内容が一致しない場合
・画像が不鮮明な場合
※In the following cases, you can not proceed next, so please change the image
· Mismatch of application content (passport information) and image content
· When the image is unclear
STEP4

登録メールアドレスに支払い案内の通知がきたら、内容を確認します。
※430GBTでロビンに登録された方は、カード2枚のお支払いは対象外となります。
メールの内容は受付番号の表記されています。
受付番号は、問合せを行う際に必要となりますので大切に保管してください。
We will confirm the contents as payment instructions will be sent to registered mail address.
※For those registered to Robin at 430 GBT, payment of 2 cards will be excluded.
The contents of the mail is written in the reception number.
Please keep the receipt number in a safe place as it is necessary for making an inquiry.

メールを開き、赤枠のURLをクリックするとTRIAMのログイン画面だ出てきます。
Open the mail and click the red frame URL, it will come out as TRIAM login screen.

ログイン後、支払いを行うWalletを選択します(複数ある場合のみ)
・カード1枚:110 GBT
・カード2枚:180 GBT(2枚 同時申込の場合)
「SETTLEMENT」をクリック
After logging in, select the payment wallet (only if there is more than one)
· 1 card: 110 GBT
· 2 cards: 180 GBT (in case of 2 simultaneous applications)
Click "SETTLEMENT"

二段階認証コードを入力し、「CONFIRM」をクリック。
Enter the two-step authentication code and click "CONFIRM".
STEP5

上記画面の表示を確認し「OK」をクリックすれば申込完了。
Confirm the display on the screen above and click "OK" to complete the application.

登録メールアドレスに受付番号が送信されているので大切に保管してください。
Since the reception number has been sent to the registered mail address please keep it in a safe place.
問合せ方法(Query method)
・受付番号
・氏名
・申請時メールアドレス
・問合せ内容をできるだけ詳しく
1.Receipt number
2.Name
3.E-mail address upon application
4.As much detail as possible of inquiry contents
2.Name
3.E-mail address upon application
4.As much detail as possible of inquiry contents
上記4点を記載し、問合せしてください
Please describe the above 4 points and inquire.